
Today, I’m sharing my step-by-step process for installing Exchange Server 2019 on Windows Server 2025. While Exchange 2019 is the latest on-premises version from Microsoft, pairing it with the newer Windows Server 2025 OS provides a solid and secure platform—especially if you’re building a modern hybrid or isolated mail environment.
🧾 Prerequisites I Took Care Of
STEP1: Prepare the Environment
1.1. System Requirements
- OS: Windows Server 2025 (Standard or Datacenter)
- RAM: Minimum 128 GB (for Mailbox role in production)
- CPU: At least 4 cores, 2.0 GHz or faster
- Disk:
- OS: 30+ GB
- Exchange: 200+ GB recommended for database + log files
- .NET: Exchange 2019 supports .NET Framework 4.8
- PowerShell: Windows PowerShell 5.1
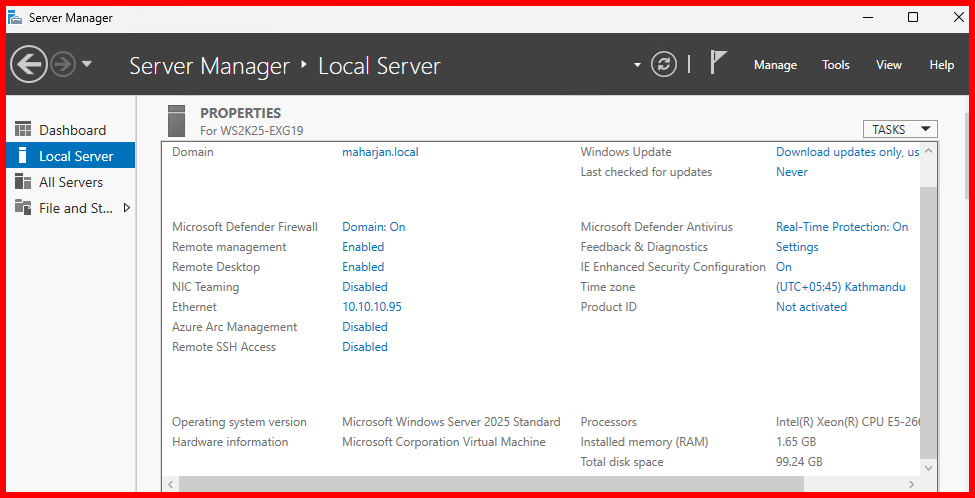
STEP2: Join Server to Domain
Before joining the server into domain network, I make sure configure the pre-setup part as given:
- A static IP address configured
- Windows Server 2025 fully updated
- Time Zone configured and License activated.
Finally, with proper naming convention server joined to Active Directory domain, and a healthy domain controller is available.
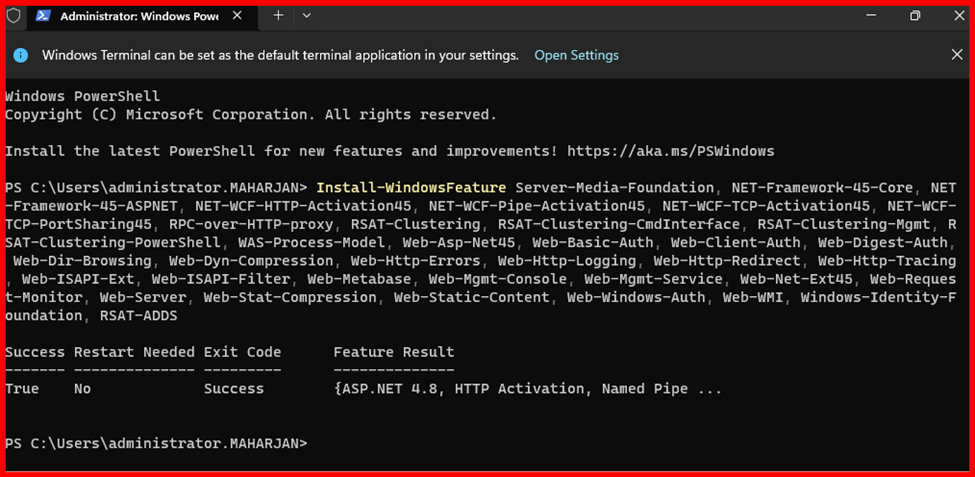
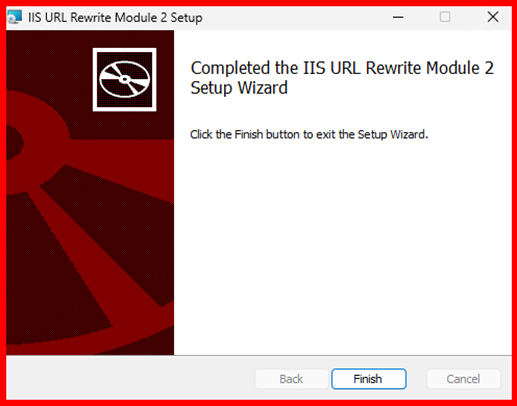
STEP3: Install Pre-requisites
3.1. Required Features and Roles
To make Exchange run smoothly, I installed the necessary Windows features using PowerShell:
Install-WindowsFeature Server-Media-Foundation, NET-Framework-45-Core, NET-Framework-45-ASPNET, NET-WCF-HTTP-Activation45, NET-WCF-Pipe-Activation45, NET-WCF-TCP-Activation45, NET-WCF-TCP-PortSharing45, RPC-over-HTTP-proxy, RSAT-Clustering, RSAT-Clustering-CmdInterface, RSAT-Clustering-Mgmt, RSAT-Clustering-PowerShell, WAS-Process-Model, Web-Asp-Net45, Web-Basic-Auth, Web-Client-Auth, Web-Digest-Auth, Web-Dir-Browsing, Web-Dyn-Compression, Web-Http-Errors, Web-Http-Logging, Web-Http-Redirect, Web-Http-Tracing, Web-ISAPI-Ext, Web-ISAPI-Filter, Web-Metabase, Web-Mgmt-Console, Web-Mgmt-Service, Web-Net-Ext45, Web-Request-Monitor, Web-Server, Web-Stat-Compression, Web-Static-Content, Web-Windows-Auth, Web-WMI, Windows-Identity-Foundation, RSAT-ADDS
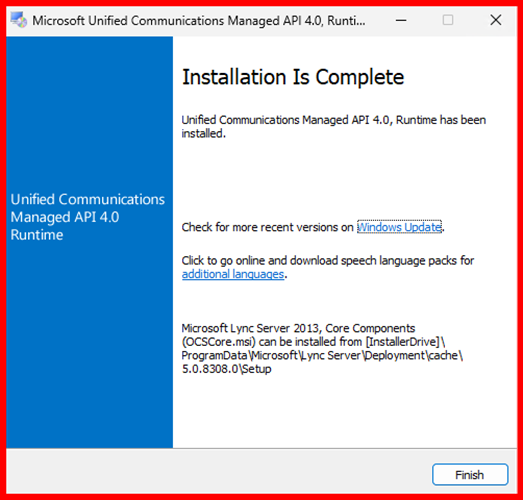
3.2. Install Unified Communications Managed API 4.0
Download from Microsoft: UCMA 4.0
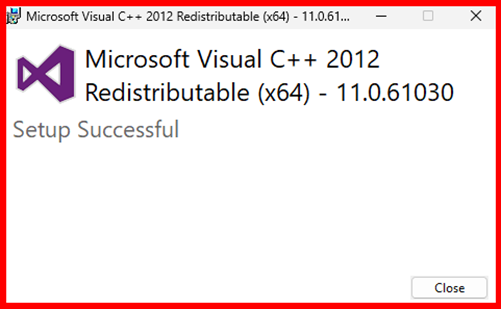
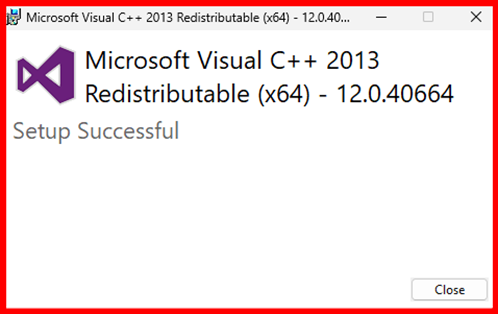
3.3. Install Visual C++ Redistributable
Download and install:
- Visual C++ 2013 x64
- Visual C++ 2012 x64
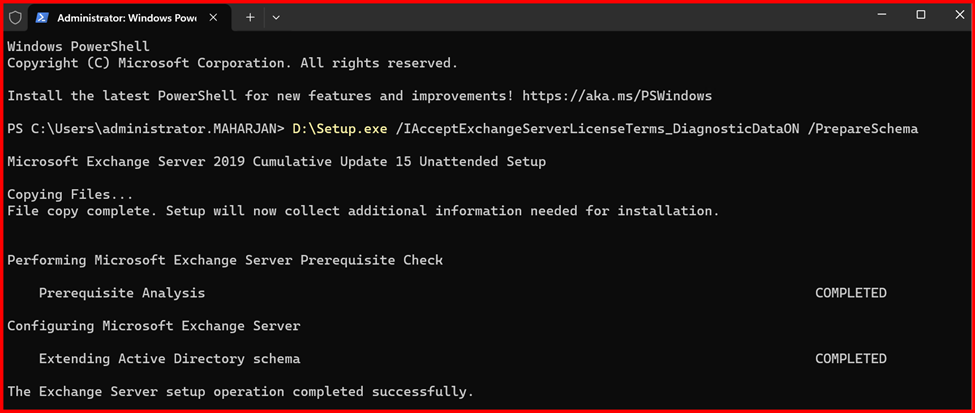
STEP4: Prepare Active Directory
For preparing Active Directory, make sure you have downloaded the Exchange ISO Setup file in your drive. Mount the Exchange ISO and run:
.\Setup.exe /PrepareSchema /IAcceptExchangeServerLicenseTerms_DiagnosticDataON
.\Setup.exe /PrepareAD /OrganizationName:"MAHARJAN" /IAcceptExchangeServerLicenseTerms_DiagnosticDataON
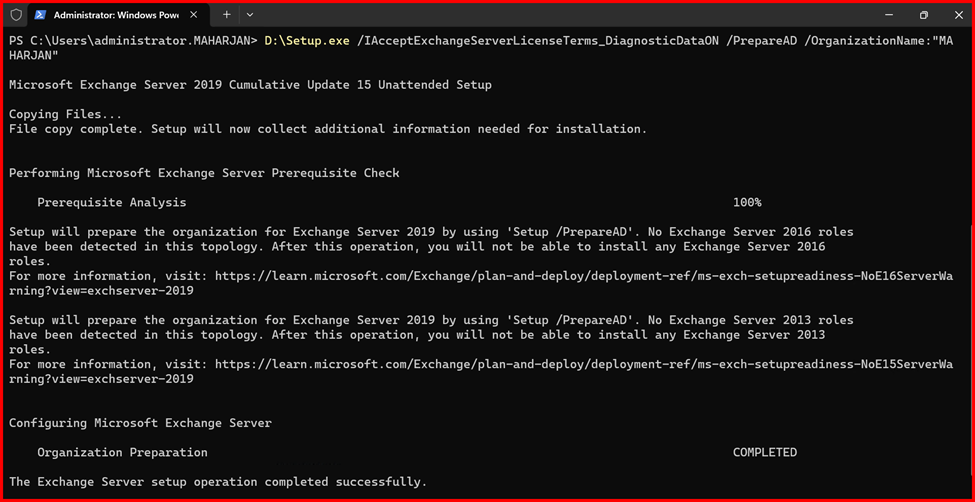
⚠️ Run these commands from a domain-joined server with Enterprise Admin rights.
Install Exchange server 2019
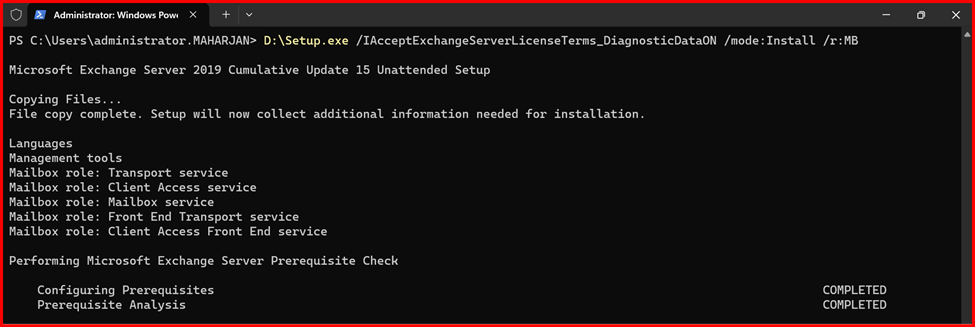
I have downloaded the Exchange server 2019 Cumulative update 15 version latest. Run setup from the mounted ISO and follow the wizard if installing via GUI but I used unattended setup (CLI):
.\Setup.exe /Mode:Install /Roles:Mailbox /IAcceptExchangeServerLicenseTerms_DiagnosticDataON
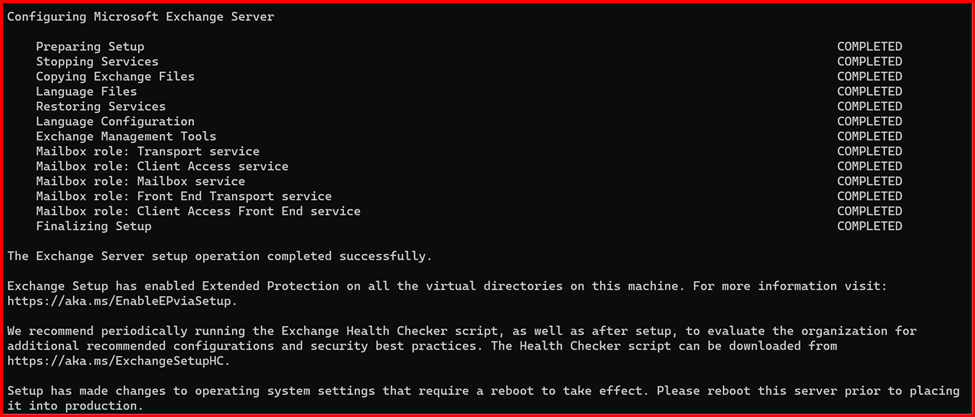
✅ Post-Installation Checks
After the installation:
- I restarted the server
- Opened Exchange Admin Center (EAC) at
https://localhost/ecp - Ran
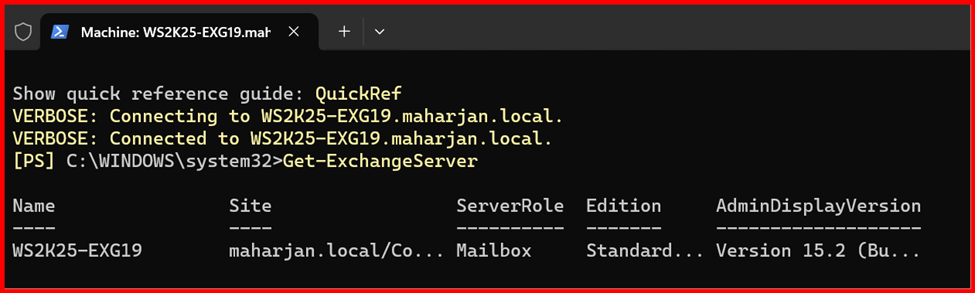
Get-ExchangeServerandTest-ServiceHealthin Exchange Management Shell to confirm all services were running
- Open Exchange Admin Center (EAC):
https://localhost/ecp

2. Open Exchange Management Shell (EMS) to verify setup:
Get-ExchangeServer
🔐 Final Thoughts
Installing Exchange Server 2019 on Windows Server 2025 went smoothly, and the performance feels solid. Just be sure to install the latest CU and keep up with Windows updates. I always recommend testing your setup in a lab before moving to production.
To be continued for configuration further steps.
Leave a Reply