When working with Azure virtual machines, especially those using multiple data disks, it’s important to know which Azure managed disk maps to which drive letter inside the Windows OS. This helps with troubleshooting, performance tuning, and disk expansion tasks.
In this blog, I’ll show you how I match Azure disk names to Windows drive letters or partitions using both Azure Portal and PowerShell.
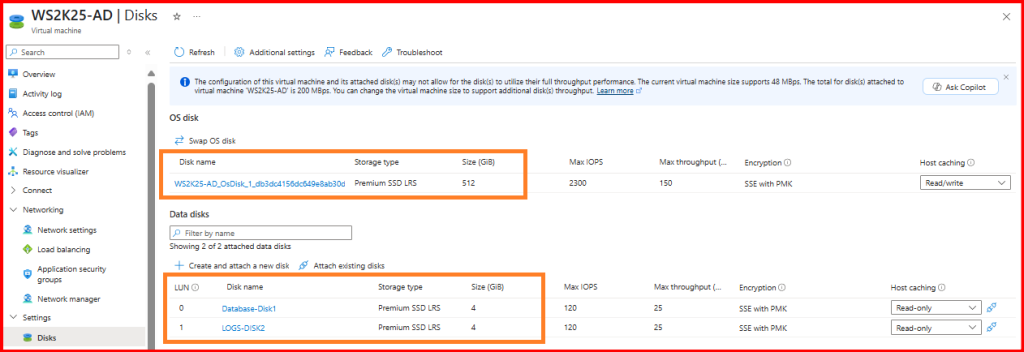
🟦 Step 1: Check Attached Disks in Azure
First, I log in to the Azure Portal and go to:
Virtual Machine > Disks
Here, I see:
- The OS Disk (no LUN)
- Any data disks, each with a LUN number
- The disk name, size, and caching settings
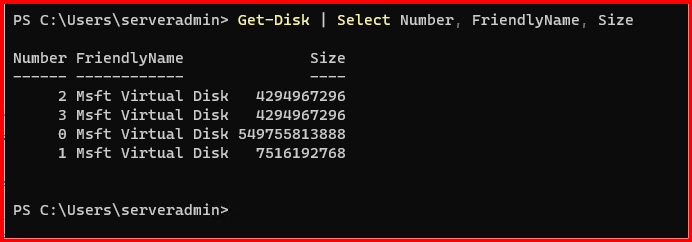
🟨 Step 2: Open PowerShell in the VM
Inside the Windows VM, I open PowerShell as Administrator and run:
Get-Disk | Select Number, FriendlyName, Size
This shows me the disk number, which corresponds to the LUN from Azure (e.g., LUN 0 → Disk 1, LUN 1 → Disk 2).
Then, I get the drive letter info:
Get-Partition | Select DiskNumber, DriveLetter, Size
Now I know which disk number is mapped to which drive letter.
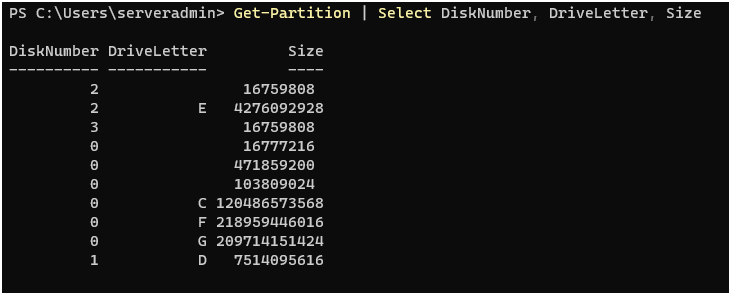
📌 Example Mapping
| Azure Disk Name | LUN | Windows Disk # | Drive Letter |
|---|---|---|---|
| WS2K25-AD_OsDisk_1_ | — | 0 (Disk Number) | C: OS (Partition) F: Shrink partition G: Shrink partition |
Database-Disk1 | 0 | 1 | D: |
LOGS-DISK2 | 1 | 2 | E: |
💡 Note: The OS disk is always Disk 0, and its LUN is not shown in Azure.
✅ Final Thoughts
Knowing how to trace Azure disks to their corresponding drive letters in a VM can save a lot of time. I recommend always labeling disks clearly in Azure and maintaining consistent disk sizes or tags to make mapping easier. This is especially useful when managing VMs with multiple data disks or migrating storage.
Leave a Reply