How to Bypass Network Connection Requirement During Windows 11 Setup in a Hyper-V VM?
If you’re setting up Windows 11 in a virtual machine (VM) — especially in Hyper-V — you might hit a roadblock: Windows 11 forces a network connection during Out-Of-Box Experience (OOBE) setup, making it difficult to create a local account. This guide shows how to bypass that using built-in methods.
🚫 The Problem
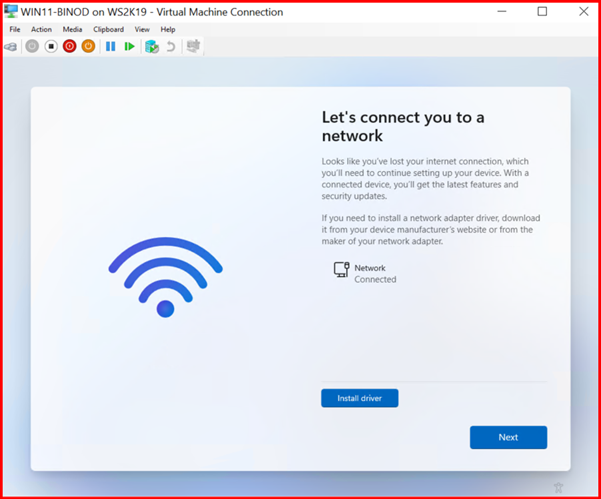
When installing Windows 11 (especially Home or newer Pro builds), you’ll see the following screen:
Let’s connect you to a network
And there’s no option to continue without a network. Even though your VM is connected, you might want to:
Avoid Microsoft account setup
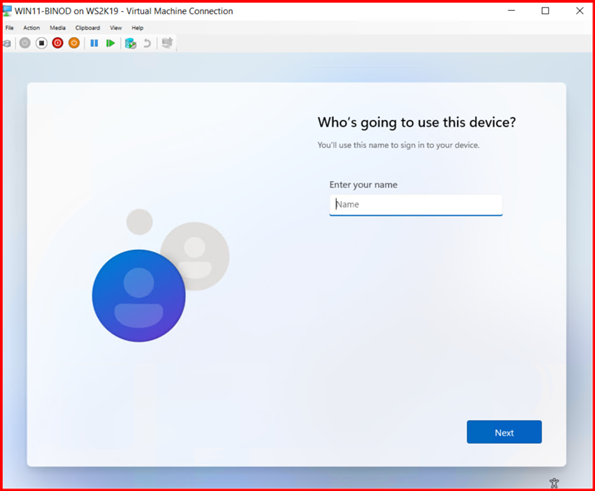
Create a local user
Continue setup in a lab or offline environment
🔧 Step-by-Step Solution (Works in Hyper-V)
🔜 Step 1: Open Command Prompt (Shift + F10 in Hyper-V)
Since you’re in a Hyper-V virtual machine, normal keyboard shortcuts might not work. Use this workaround:
Option A: Use Hyper-V Menu
In the VM window, click on the Action menu.
Choose Insert Ctrl+Alt+Del.
Now press Shift + F10 on your keyboard (you may need to use Shift + Fn + F10 on laptops).
This will open a Command Prompt window.
🔜 Step 2: Resolve the Problems
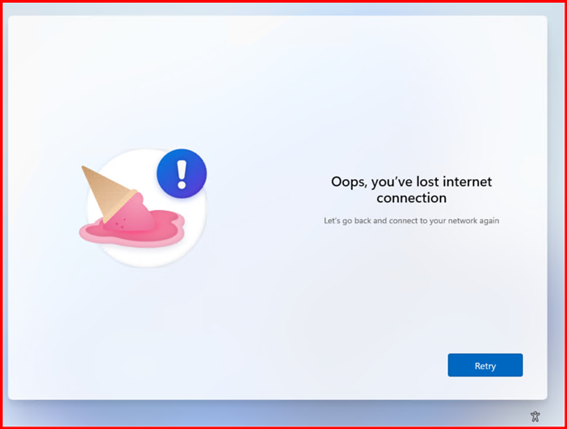
Option1: Disable Network Temporarily
Inside the Command Prompt, type: ipconfig /release
This disables your current network adapter and simulates a disconnection. Then type: exit Close the Command Prompt.
You should now be presented with the “I don’t have internet” option. Select it and continue setup using a local account.
Option2: Renew IP Address
After Exit. Click on Next. Update will take some time and moves ahead with Next.


Leave a Reply