Favicon | Title Bar Name | Sidebar Color | OWA Logo Image
In this blog, I’m sharing how I personalized the Exchange OWA (Outlook Web App) login page to better reflect my organization’s branding. I made visual changes to:
- The favicon icon
- The browser tab title
- The left sidebar color
- The default blue “OWA” image
These small tweaks make the login page look more professional and help users feel like they’re on an official company site.
🧭 Step 1: Locate the OWA Auth Folder
Step1.1 All OWA login page resources are stored in this folder:
C:\Program Files\Microsoft\Exchange Server\V15\FrontEnd\HttpProxy\owa\auth
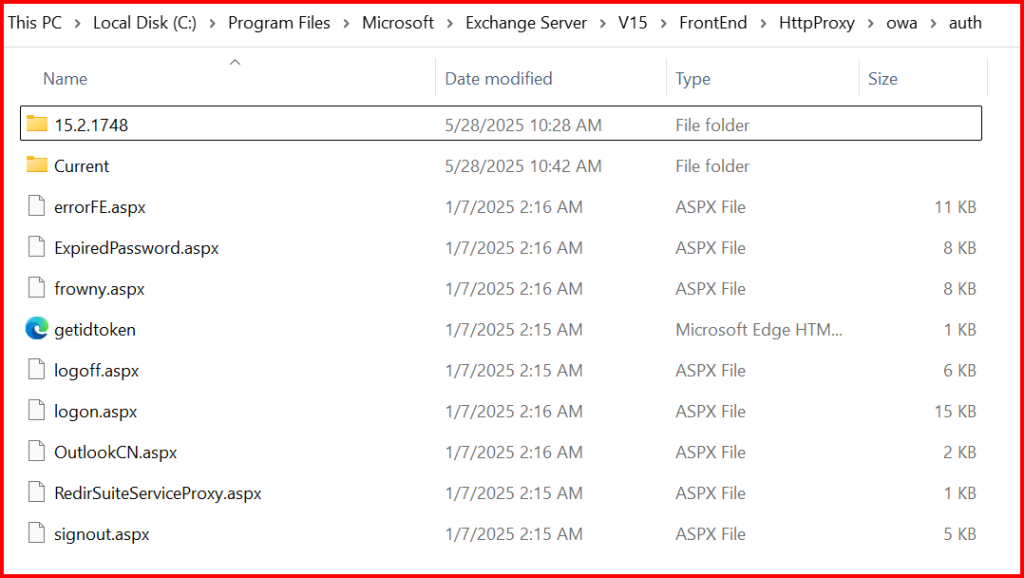
Step1.2 Before making changes, I always take a backup:
Copy-Item "C:\Program Files\Microsoft\Exchange Server\V15\FrontEnd\HttpProxy\owa\auth" -Destination "C:\Backup\owa-auth-$(Get-Date -Format 'yyyyMMdd')" -Recurse

🖼️ Step 2: Customize the Title bar
Step2.1: Change the Favicon Icon
To update the browser tab icon (favicon):
- I created a new
favicon.icofile.- Size: 16×16 pixels.
- Format:
.ico.
- I replaced the existing favicon:
C:\Program Files\Microsoft\Exchange Server\V15\FrontEnd\HttpProxy\owa\auth\15.2.1748\themes\resources\favicon.ico

3. Optionally, I cleared the browser cache to see the change take effect.
✍️ Step 2.2: Customize the Title Name (Browser Tab Title)
To change the browser tab title from “Outlook” to something like “MyCompany Webmail”:
- I opened the following file:
C:\Program Files\Microsoft\Exchange Server\V15\FrontEnd\HttpProxy\owa\auth\logon.aspx
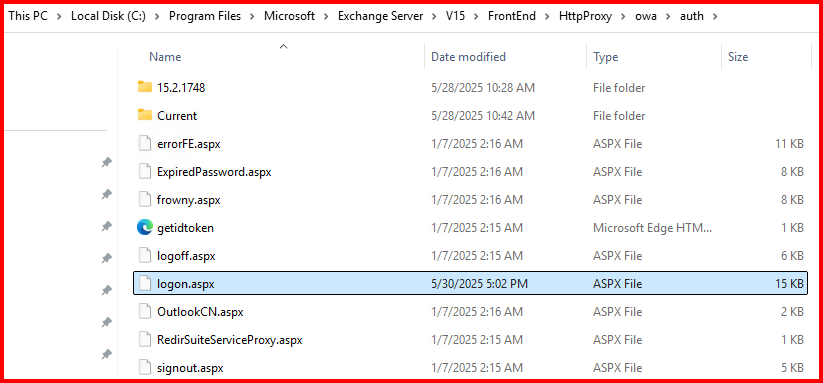
2. I searched for the <title> tag. I changed it to my custom title:

Output:

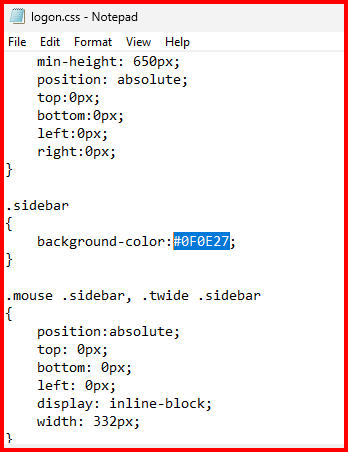
Step3: Change the Sidebar Color
To modify the default dark blue left sidebar:
1. I edited the CSS file: logon.css
C:\Program Files\Microsoft\Exchange Server\V15\FrontEnd\HttpProxy\owa\auth\15.2.1748\themes\resources
2. I searched for the sidebar color definition. You can try editing background-color I changed the hex color code to match our brand.
Output:
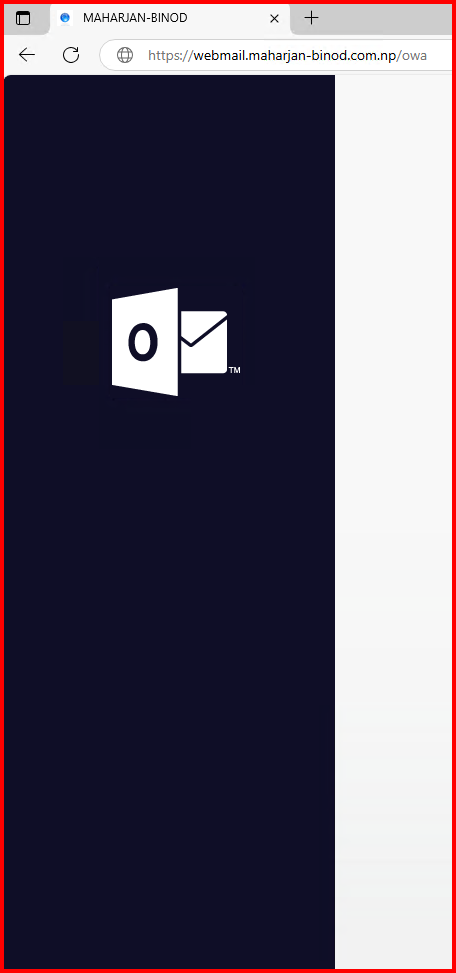
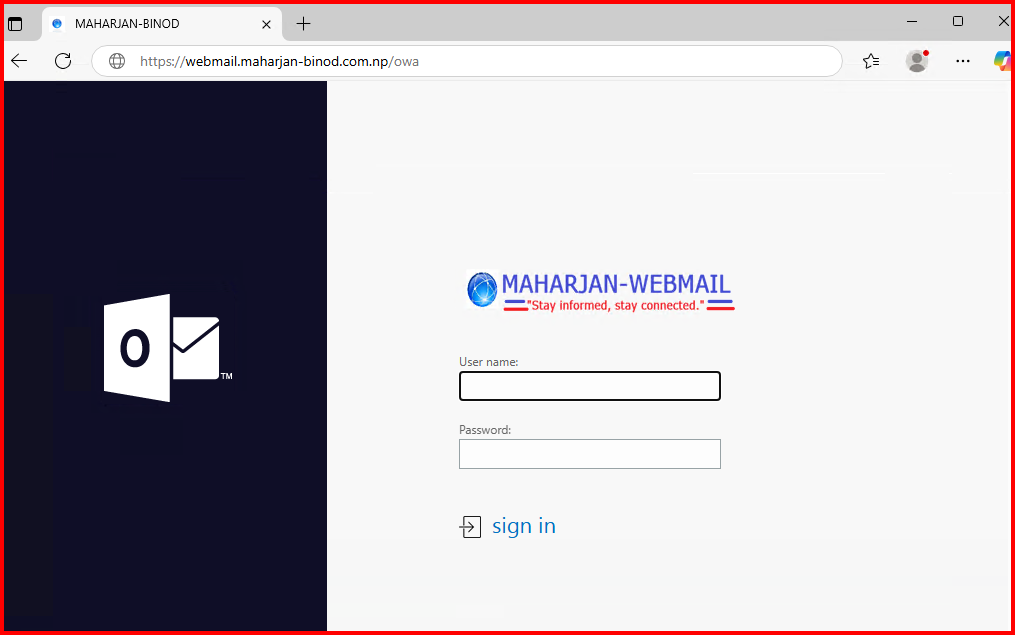
Step4: Replace the Default Blue OWA Text Image “Outlook Web App”
To replace the OWA logo (that big “OWA” text in blue):
1. I created a custom image named and replaced the existing image in : “owa_text_blue.png”
C:\Program Files\Microsoft\Exchange Server\V15\FrontEnd\HttpProxy\owa\auth\15.2.1748\themes\resources
Note: Ensure before changing the file, your image has match the Dimensions (Width & Height).
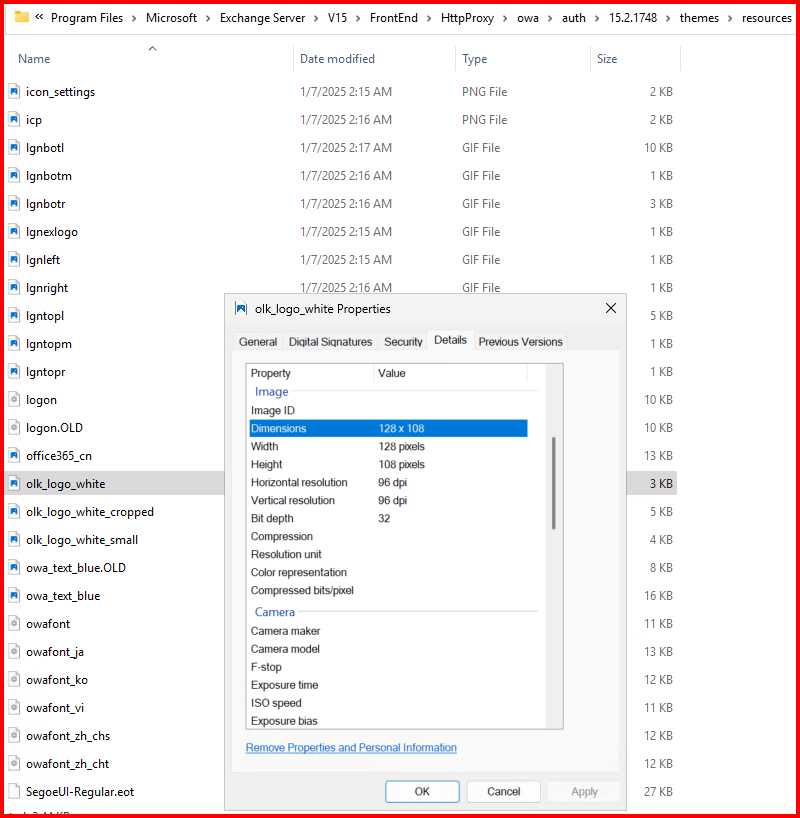
✅ Bonus Tip: In the same folder, there’s also a file named olk_logo_white.png — this is the sidebar logo image shown on the left side of the login page. I replaced it with our company logo to further brand the interface.
2. I used the same method to replace any other image file in that folder to match our company’s branding. Just ensure the image dimensions are appropriate for the UI and that the file format matches (usually .png or .jpg).
3. After clearing the browser cache and refreshing the OWA login page, the new images appeared perfectly.
Output:
🔁 Step 5: Apply the Changes
After completing all modifications, I restarted IIS to apply changes: iisreset /noforce
✅ Final Result
With these changes in place, my OWA login page now shows:
- Our brand icon in the browser tab.
- A custom tab title (“MyCompany Webmail”).
- A new color theme in the sidebar.
- A custom image replacing the default blue OWA logo.
It looks modern, consistent with our brand, and much more professional.
🧠 Final Notes
- These changes may be overwritten during Cumulative Updates (CU), so I keep copies of all modified files in a separate backup folder.
- These customization are not officially supported by Microsoft, so use them with caution in production environments.
- Always test in a lab environment before applying changes to production.
📌 Conclusion
Customizing the Exchange OWA login page was a simple yet impactful way to align our mail portal with our company’s identity. From changing the favicon to adding a custom OWA logo, these updates helped create a polished and trusted experience for our users.
🎯 Pro Tip: A branded login page not only looks good—it also gives users reassurance they’re in the right place.
Leave a Reply