
Subsites have been a core part of SharePoint’s site architecture for years. While Microsoft encourages a flat structure using Hub Sites in modern SharePoint Online, subsites still have valid use cases—such as organizing team-specific spaces under a project or department site.
In this post, we’ll walk through:
✅ What subsites are
✅ Why and when to use them
✅ How to enable subsite creation in SharePoint Online (modern experience)
✅ Step-by-step: How to create a subsite
📘 What Is a SharePoint Subsite?
A subsite is a child site created under a top-level site (site collection). It can inherit permissions, navigation, and theme from its parent or be managed independently.
Example Use Cases:
- A project site with subsites for each team: HR, Finance, IT
- Department sites with subsites for internal projects
- Temporary collaboration sites for specific events
🧭 Flat vs Nested (Subsite) Architecture
| Architecture | Description | Recommended For |
|---|---|---|
| Flat (Hub) | Separate site collections connected via Hub Site | Modern approach, scalability |
| Nested (Subsite) | Sites organized hierarchically under a parent | Legacy support, localized control |
➡️ Microsoft recommends flat architecture, but subsites are still supported—just hidden by default in the modern UI.
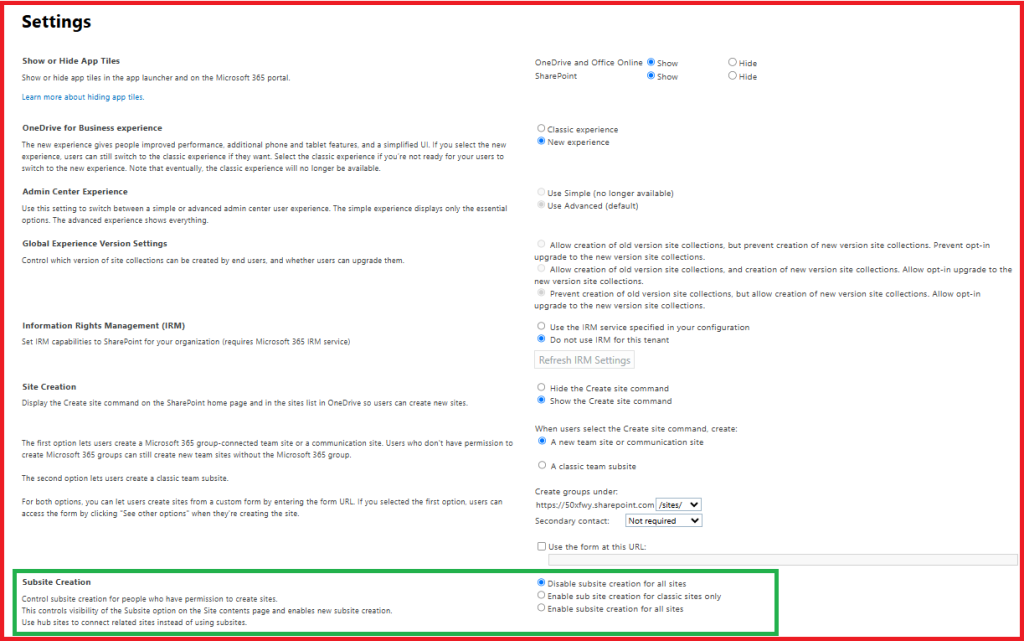
🔓 How to Enable Subsite Creation in SharePoint Online
By default, the option to create subsites is hidden in the modern SharePoint experience.
👣 Steps to Enable It:
- Open SharePoint Admin Center
- Go to https://admin.microsoft.com
- Navigate to Admin centers > SharePoint
- Select Your Site
- Under “Active Sites,” find the site where you want to allow subsites.
- Click “Settings”
- Scroll to “Subsite creation”
- Choose Option
- Select “Show the Subsite command only for classic sites”
OR - Select “Show the Subsite command for all sites”
- Select “Show the Subsite command only for classic sites”
- Save
🔁 It may take a few minutes for the “New Subsite” option to appear under the Site Contents section of the parent site.

🏗️ How to Create a Subsite in SharePoint Online
Once enabled, follow these steps:
✅ Steps:
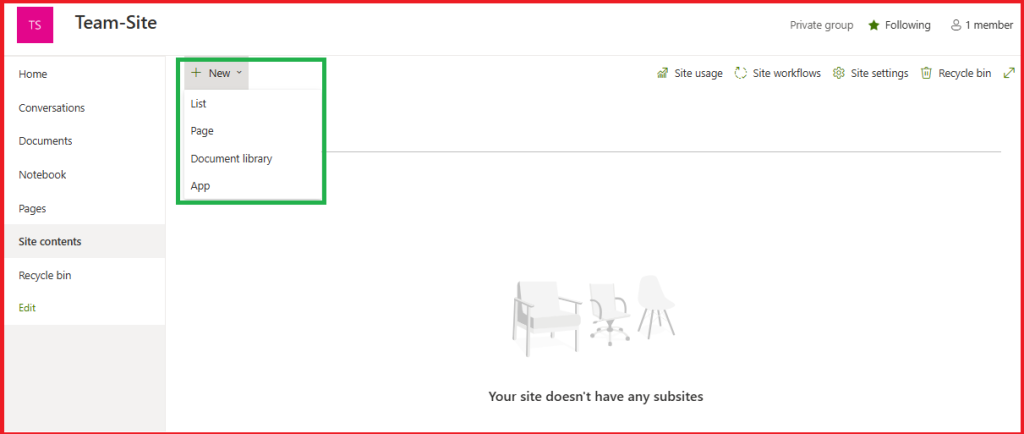
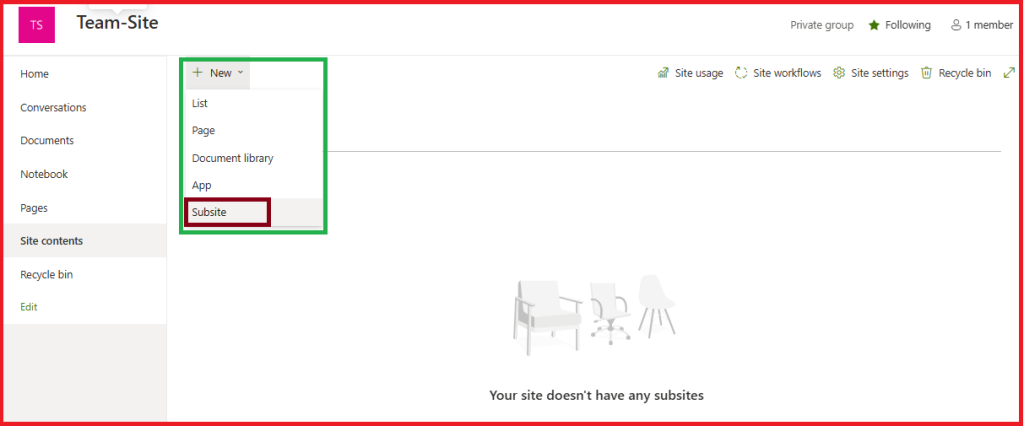
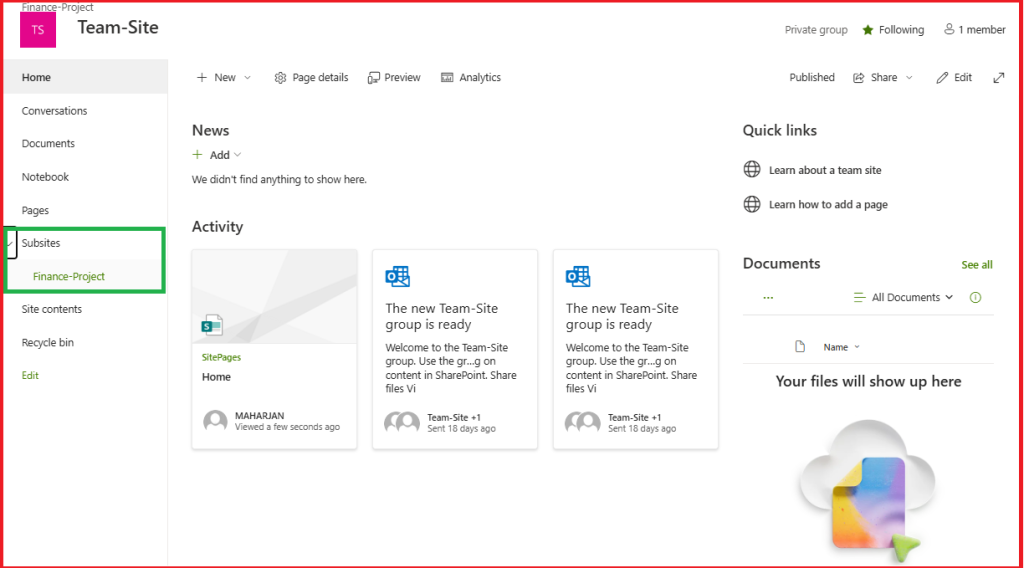
- Navigate to the parent site
- Go to Site Contents
- Click “New > Subsite”
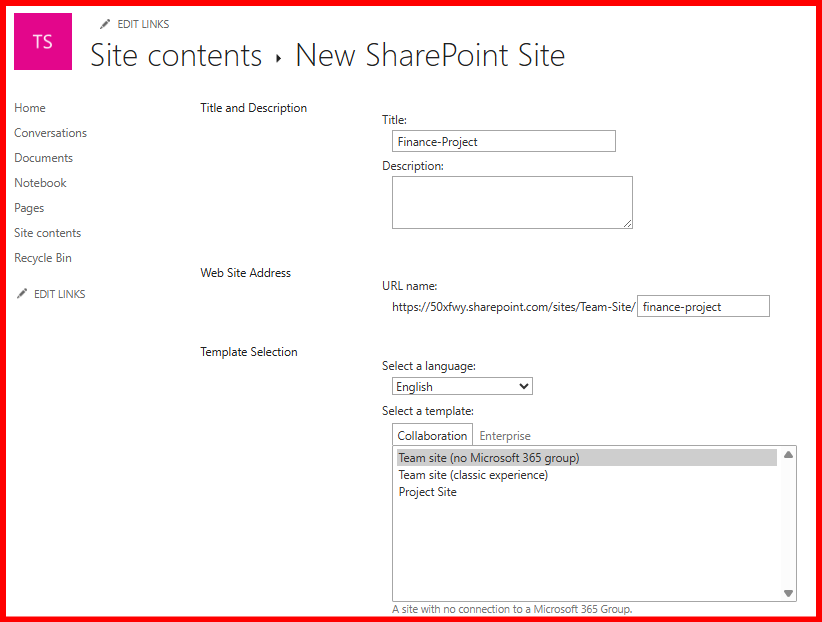
- Enter Subsite Info
- Title: e.g., “Finance Project”
- URL name: e.g.,
finance-project - Template: Choose “Team Site,” “Document Center,” etc.
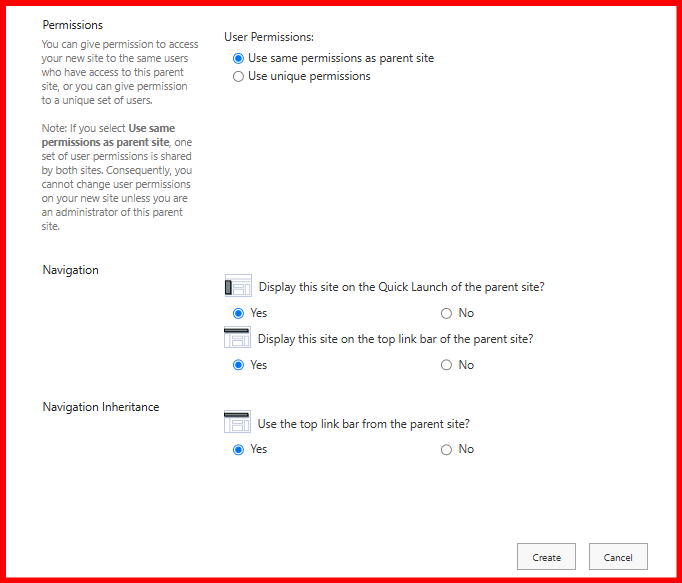
- Permissions: Inherit from parent or set unique
- Navigation: Include in parent and/or subsite navigation
- Click Create
🎉 That’s it! You now have a subsite ready to configure with libraries, lists, pages, and permissions.
🔐 Best Practices for Subsites
- ✅ Use subsites for tightly bound teams under the same lifecycle
- ❌ Avoid deep hierarchies (sub-sub-subsites)
- ✅ Clearly label and manage permissions
- ✅ Use hub sites when broader discoverability and flexibility are needed
🧪 Demo or Lab Practice
Demo Scenario:
Create a subsite named “IT Tasks” under your “Operations” site. Use the Team Site template and assign unique permissions.
Tasks:
- Enable subsite creation from SharePoint Admin Center
- Create the subsite and configure navigation
- Add a document library and share with a specific group
🏁 Conclusion
Subsites may be an older concept, but they still serve practical needs. Knowing when and how to use them wisely can help you deliver organized, secure, and functional SharePoint environments. Whether you’re building collaboration spaces or isolated project sites, subsites remain a valid and powerful tool—when used with purpose.
Leave a Reply