Introduction
In the first part of this series, we secured the Operating System drive. However, in many enterprise environments, workstations are equipped with secondary internal drives for storage. Leaving these “Fixed Data Drives” unencrypted creates a massive security gap.
In Part 2, we’ll explore how to extend our BitLocker policy to secondary drives and, more importantly, how to implement Auto-Unlock. This ensures that once a user unlocks their OS drive, all other internal drives open automatically providing security without sacrificing productivity.
1. The Strategy: Auto-Unlock vs. Manual Password
For an internal drive (like a 1TB D: drive), you don’t want your users to type a second password every time they reboot.
- The Logic: We use the OS drive (C:) as the “trusted unlocker.”
- The Requirement: The OS drive must be encrypted and protected by BitLocker first.
2. Configuring the Group Policy
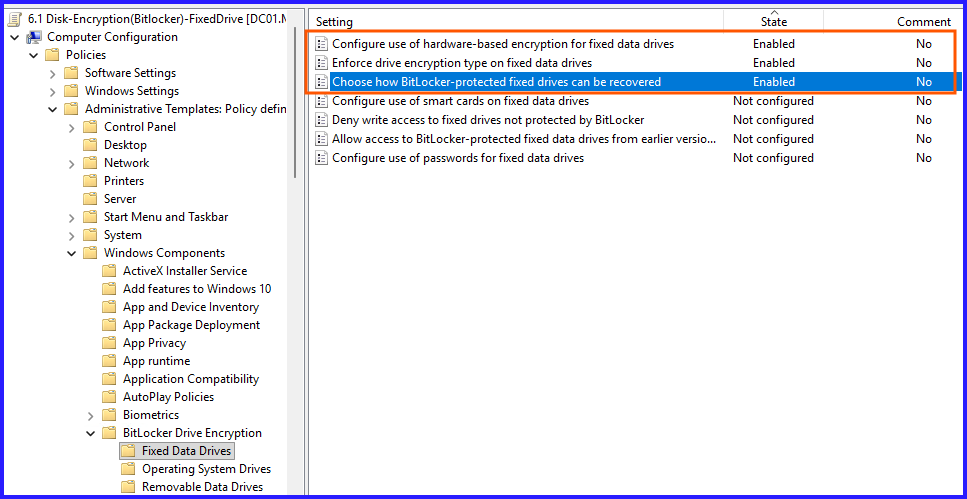
Navigate to: Computer Configuration > Policies > Administrative Templates > Windows Components > BitLocker Drive Encryption > Fixed Data Drives
Key Settings to Configure:
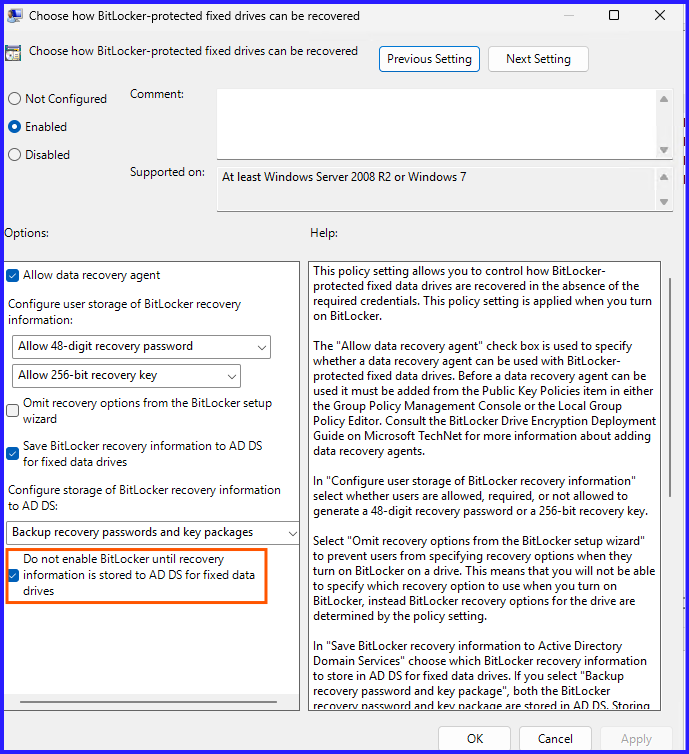
- Choose how BitLocker-protected fixed drives can be recovered: Just like in Part 1, set this to Enabled and ensure “Backup to AD DS” is checked.
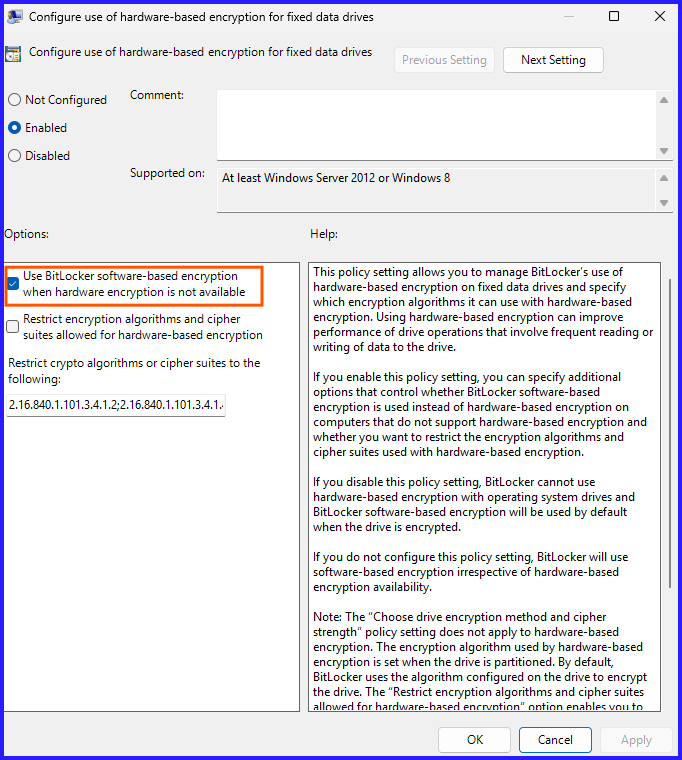
- Configure use of hardware-based encryption: Set to Enabled to allow SSDs with built-in encryption to handle the workload, reducing CPU overhead.
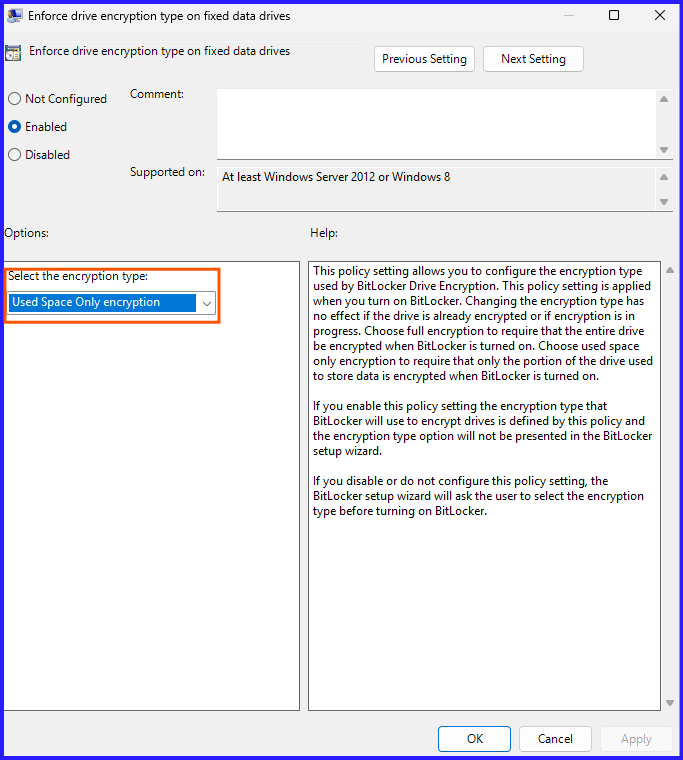
- Enforce drive encryption type on fixed data drives: Select Used Space Only. This is a lifesaver for users; it makes the initial encryption take minutes instead of hours on large drives.
3. The Automation: Handling Multiple Drives via PowerShell
Manually right-clicking “Turn on BitLocker” for every drive isn’t an option at scale. Use this script to loop through all internal drives and enable Auto-Unlock automatically:
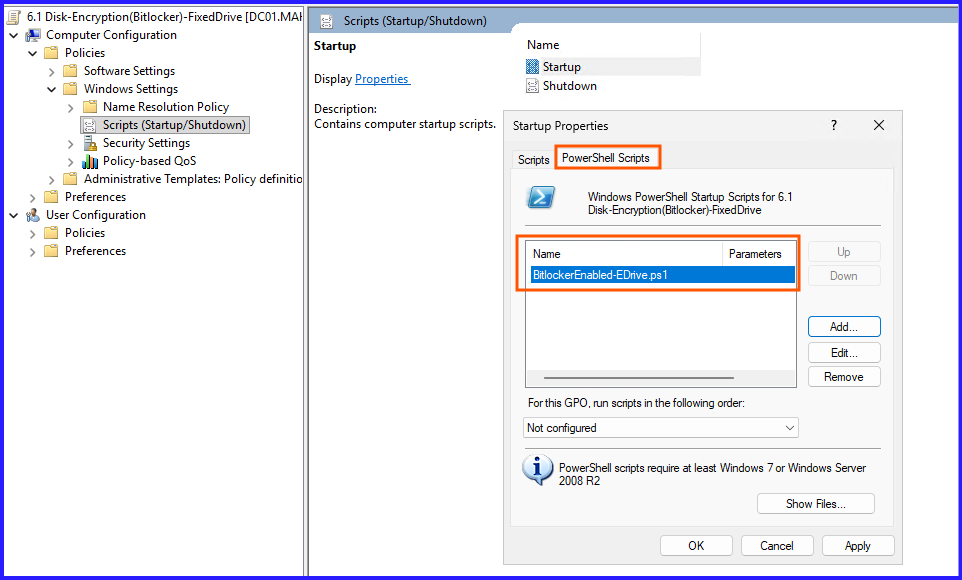
Option1: If you want specific drive to enable BitLocker like D: use given PowerShell command:
Enable-BitLocker -MountPoint "E:" -EncryptionMethod Aes256 -UsedSpaceOnly -RecoveryPasswordProtectorSave it as BitlockerEnabled-EDrive.ps1 and add PowerShell Script in Startup policy.
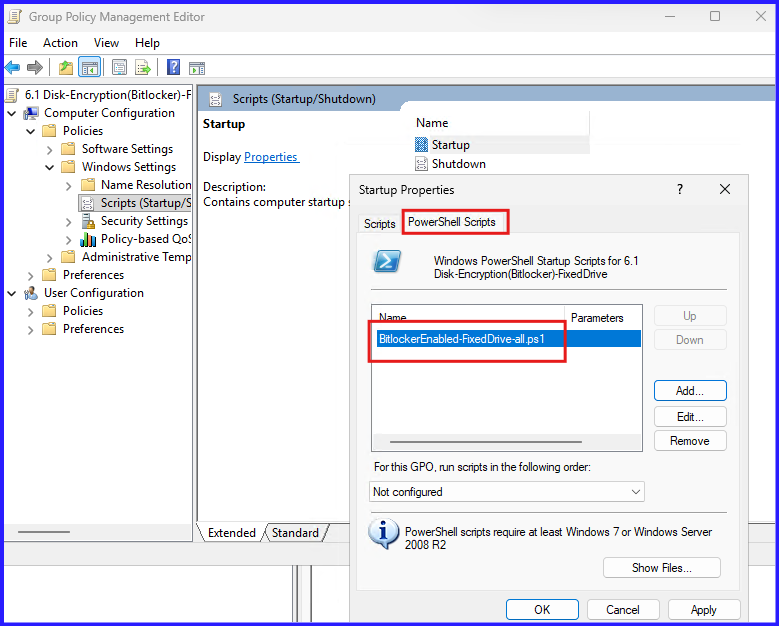
Option2: What if, you want all drives to enable BitLocker encryption. Use given PowerShell Script:
# Get all fixed drives except the OS drive
$Drives = Get-Volume | Where-Object { $_.DriveType -eq 'Fixed' -and $_.DriveLetter -ne 'C' }

foreach ($Drive in $Drives) {
    $DriveLetter = ($Drive.DriveLetter + ":")

    # Check if Bitlocker is already enabled
    $BLStatus = Get-BitLockerVolume -MountPoint $DriveLetter

    if ($BLStatus.ProtectionStatus -eq 'Off') {
        Write-Host "Enabling BitLocker for $DriveLetter..."
        # Enable BitLocker, add recovery password, and backup to AD
        Enable-BitLocker -MountPoint $DriveLetter -EncryptionMethod Aes256 -UsedSpaceOnly -RecoveryPasswordProtector

        # Enable Auto-Unlock (Requires C: to be encrypted first)
        Enable-BitLockerAutoUnlock -MountPoint $DriveLetter
    } else {
        Write-Host "$DriveLetter is already protected."
    }
}
Save it as BitlockerEnabled-FixedDrive-all.ps1. Add PowerShell Script in Startup Policy.
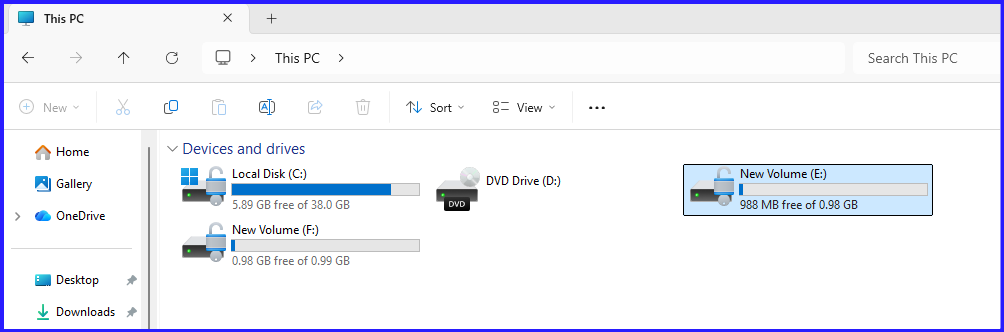
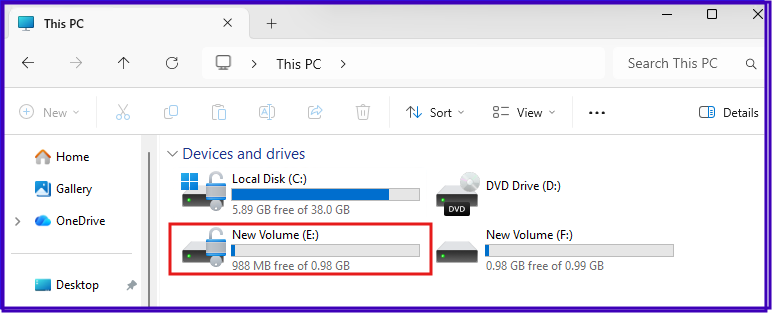
4. Verification: The “Seamless” Experience
After the GPO is applied and the script runs, verify the status:
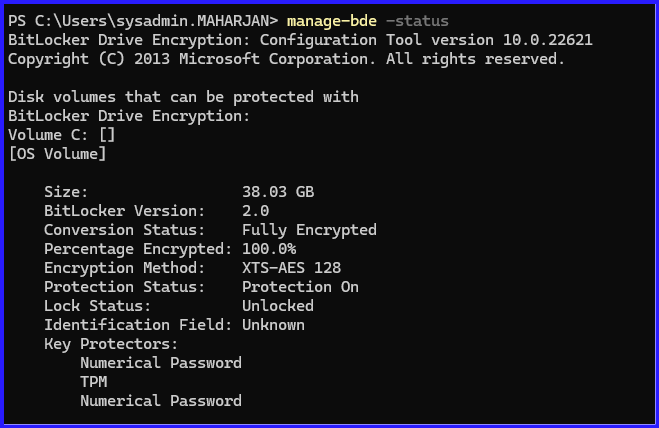
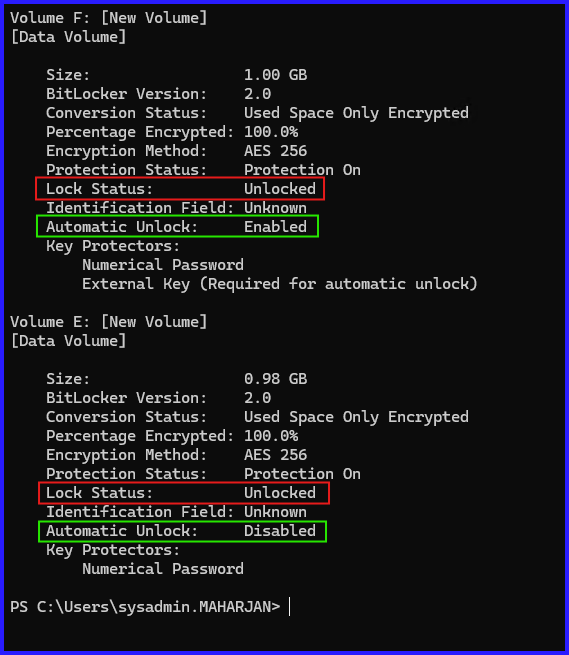
- Run
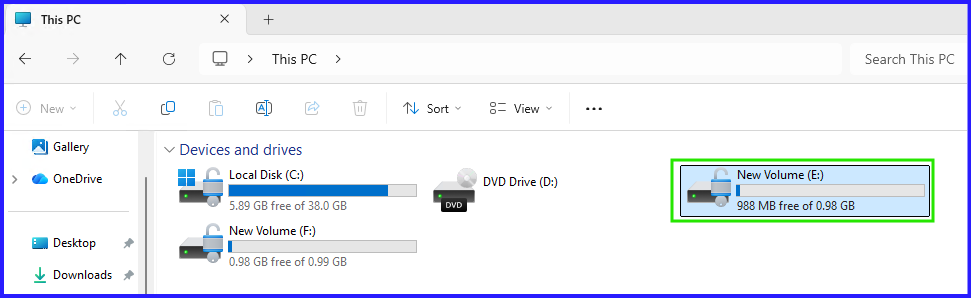
manage-bde -statusto confirm the D: drive shows “Lock Status: Unlocked” and “Auto Unlock: Enabled.” - Reboot the machine. The user should only see the C: drive unlock screen (if using a PIN) or the standard Windows login. The D: drive should be ready to use immediately upon reaching the desktop.
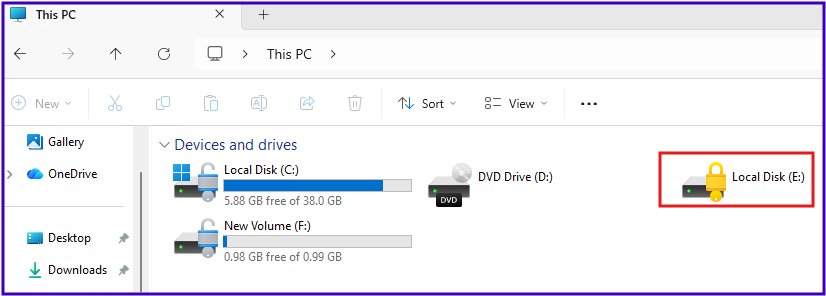
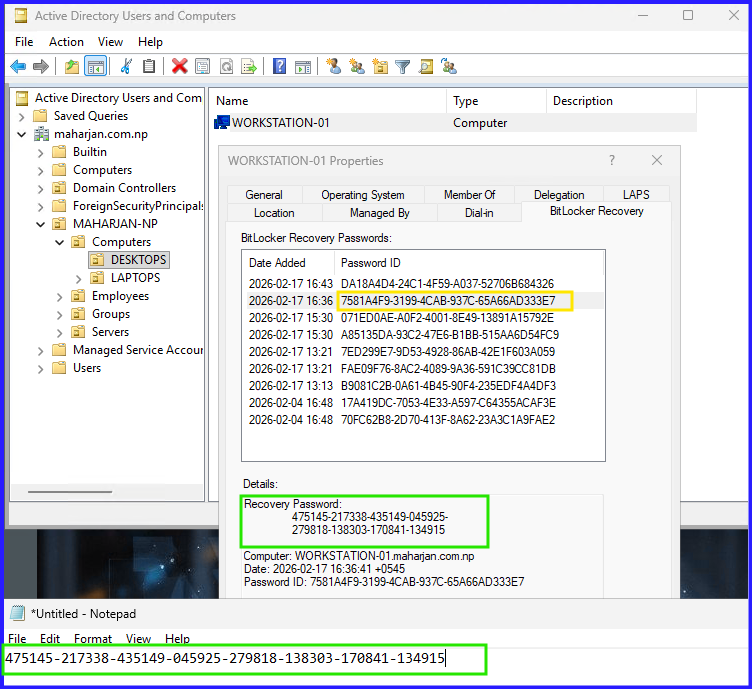
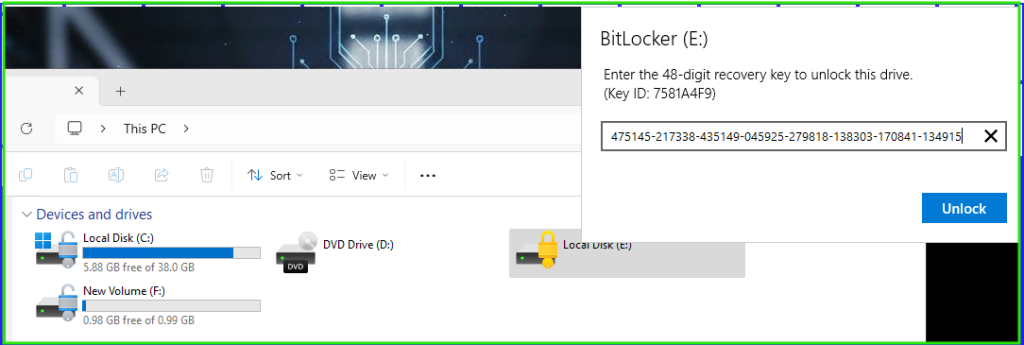
5. Get BitLocker Recovery Password and Unlock the Drive.
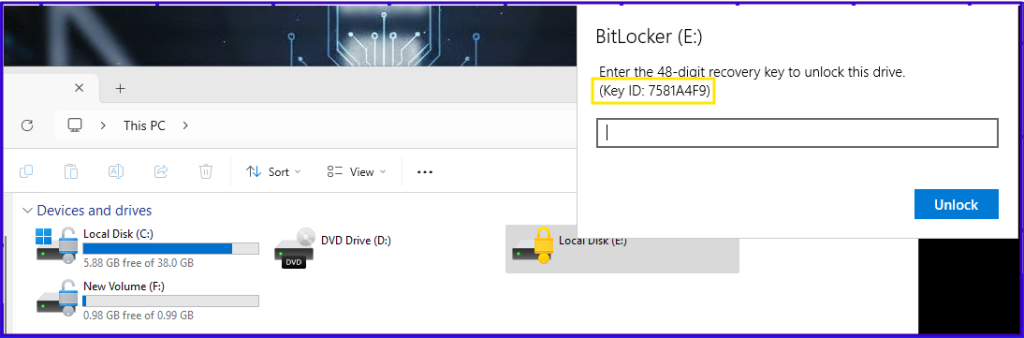
Retrieve the Recovery Password:
Conclusion: Completing the Internal Security Loop
By automating the encryption of fixed data drives, we’ve ensured that all data at rest within the machine is protected. The beauty of this setup is its invisibility; once configured, the user never has to interact with BitLocker for their secondary drives.
In Part 3 of this series, we will tackle the “wild west” of storage: Removable Data Drives (USB and External HDDs) and how to prevent unauthorized data exfiltration.