Introduction
In an era where physical device theft and sophisticated “cold boot” attacks are rising, relying on transparent encryption is no longer enough for high-stakes environments. While BitLocker’s “Auto-Unlock” features provide a seamless user experience, they often leave a window of vulnerability by decrypting data as soon as a device powers on or a user logs in. As we scale our security infrastructure—whether managing a large-scale tenant migration or hardening domain controllers—we must shift our philosophy from convenience to Explicit Authentication. This post details the technical transition to a “Zero Trust” BitLocker configuration: enforcing mandatory pre-boot PINs for OS drives and manual password triggers for fixed data volumes.
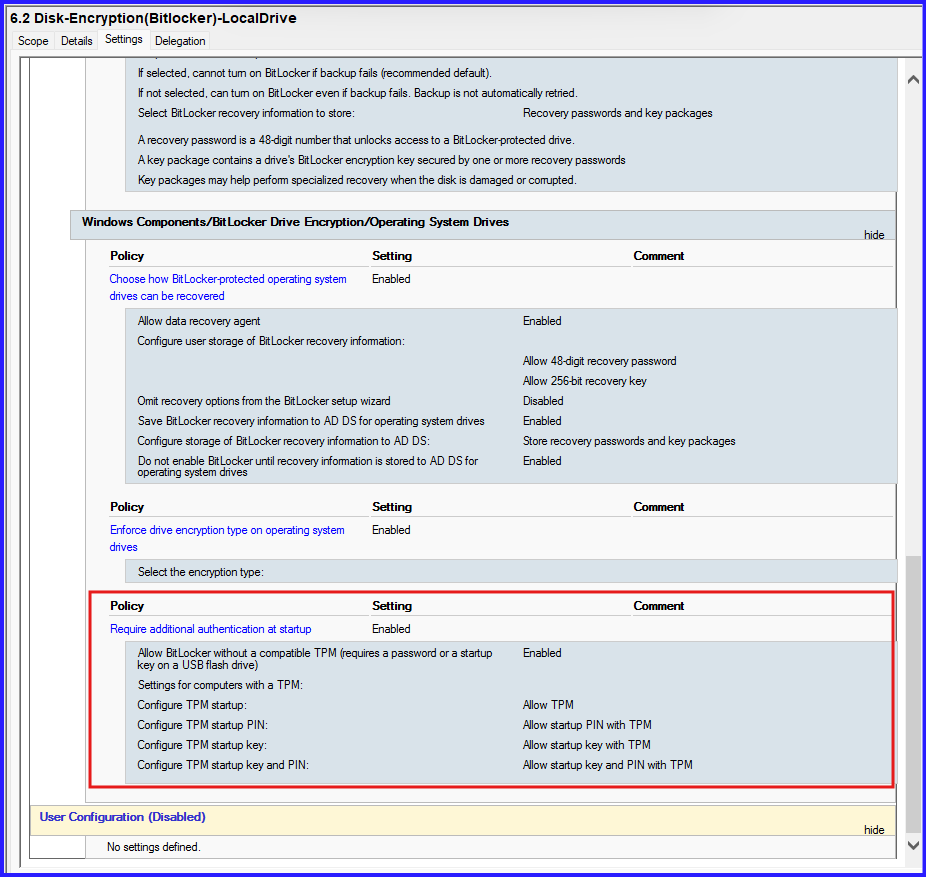
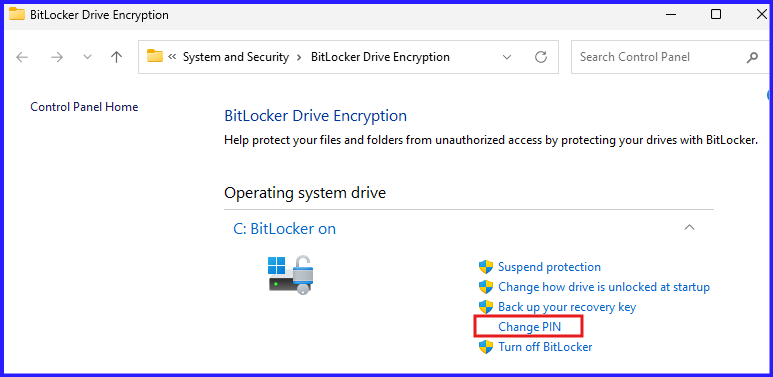
1. OS Drive (C:): Enabling Pre-boot PIN
Previously, the OS drive might have relied on “TPM-only” authentication, allowing the machine to boot directly to the Windows login screen. We are now adding a TPM + PIN requirement, which forces the user to enter a numeric code before the OS even begins to load.
GPO Requirements:
- Path:
Computer Configuration > Admin Templates > Windows Components > BitLocker Drive Encryption > Operating System Drives - Settings: Enable “Require additional authentication at startup” and set “Configure TPM startup PIN” to “Require startup PIN with TPM.”
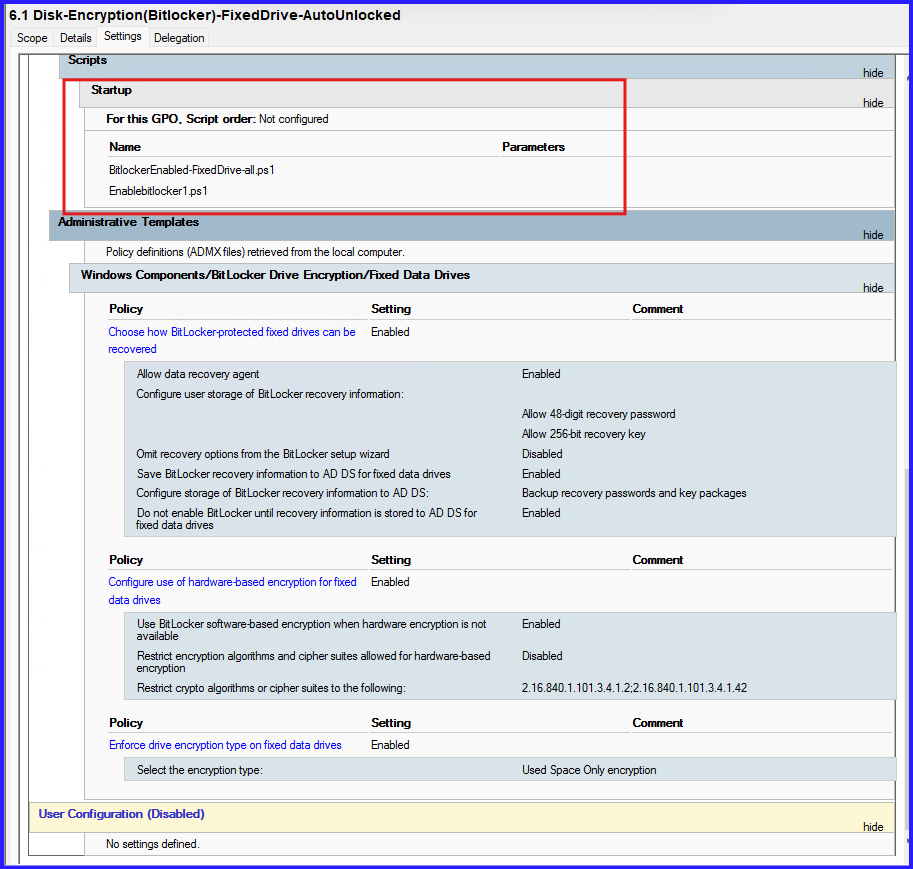
2. Fixed Data Drives: Manual Password & Disabling Auto-Unlock
For secondary fixed drives (e.g., D: or E:), “Auto-Unlock” allows the drive to open automatically once the user logs in. By disabling this and setting a manual password, the drive remains locked until the user explicitly provides credentials.
The Workflow:
- Disable Auto-Unlock: This ensures the drive does not leverage the OS drive’s key to open.
- Add Password Protector: A user-defined alphanumeric password is added to the volume.
- Manual Access: The user must now unlock the drive via the Windows interface or the 48-digit Recovery Password.
# 1. Ask the user for the password manually
$UserPass = Read-Host "Enter the password to lock this Fixed Drive" -AsSecureString

# 2. Enable BitLocker with the Password Protector
# We REMOVE the -AutoUnlock flag to ensure it stays locked until the password is typed
Enable-BitLocker -MountPoint "D:" -PasswordProtector $UserPass -UsedSpaceOnly -SkipHardwareTest

# 3. Key upload to AD (Critical for your Forensic/Admin role)
$keyID = Get-BitLockerVolume -MountPoint "D:" | select -ExpandProperty keyprotector |
            where {$_.KeyProtectorType -eq 'RecoveryPassword'}
Backup-BitLockerKeyProtector -MountPoint "D:" -KeyProtectorId $keyID.KeyProtectorId
Save it as EnableBitlocker-PasswordProtected.ps1 and add in Startup policy. For Fixed Drive BitLocker Enable Script I have covered in Part2 Series.
3. Task for Changes
| Feature | Old Configuration | New Configuration |
| OS Drive (C:) Boot | Automatic (TPM Only) | Manual PIN Required |
| Fixed Drive (D:) Access | Auto-Unlock (On Login) | Manual Password Required |
| Recovery Strategy | Active Directory Backup | Active Directory Backup |
4. Task for Configuration
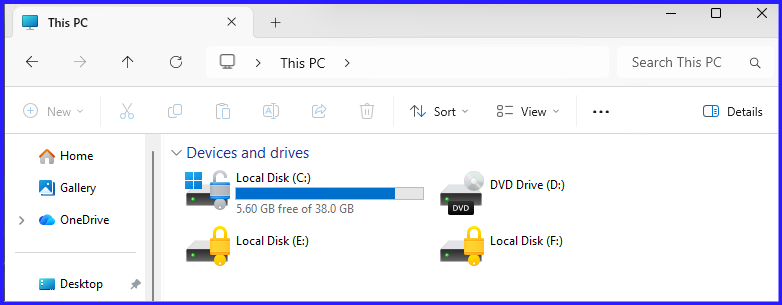
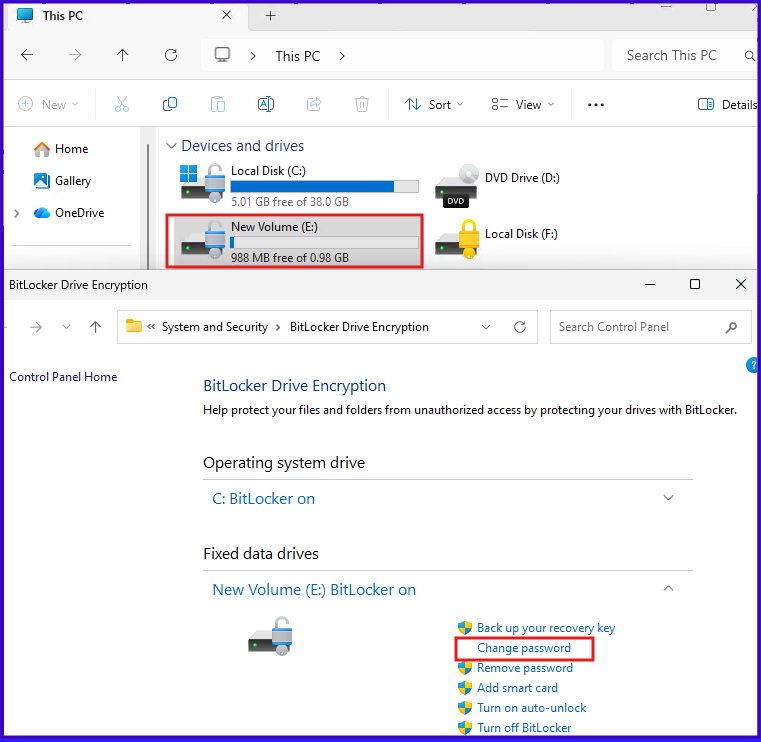
After applying the above Group Policy to Workstation, BitLocker Enabled where Operating Drive (C:) is Auto-Unlock and Fixed Drives like (E: & F:) is locked with manual.
Step1: Setup for Pre-boot via PIN
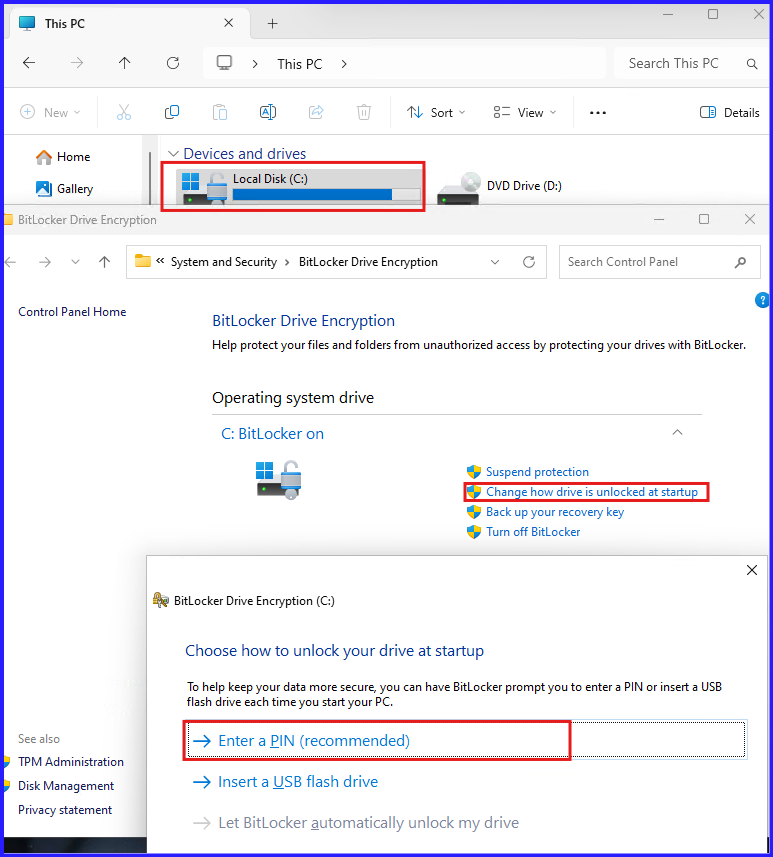
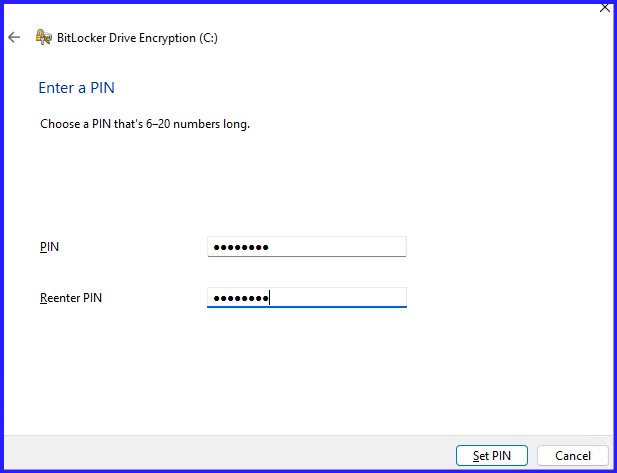
After Reboot the PC, to login needs to enter pin to unlock the drive.
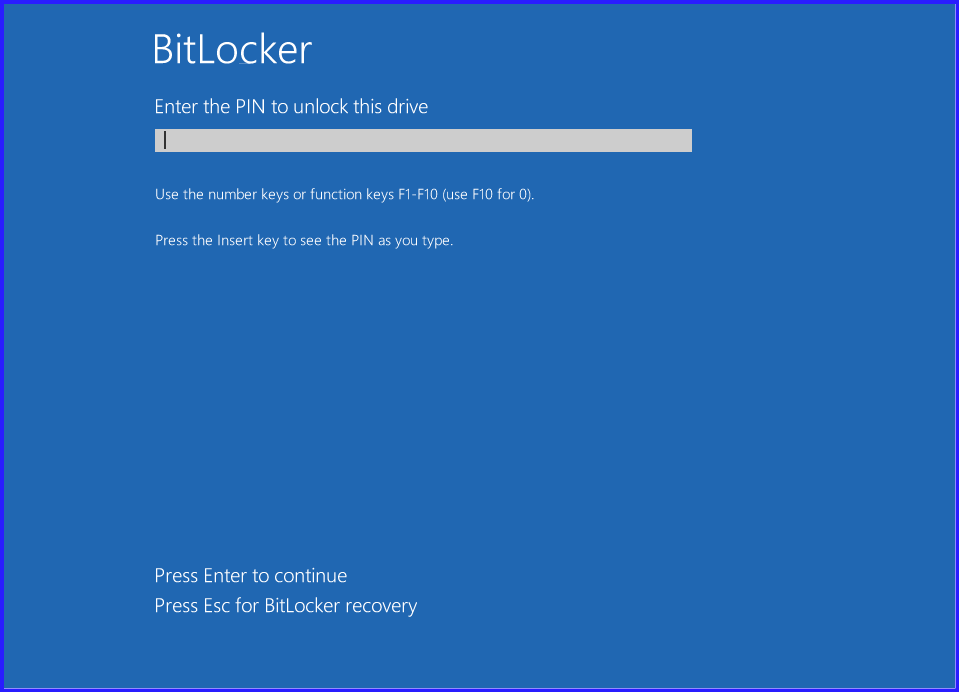
After Successful entering PIN, then ask for PC password to login.
Step2: For Fixed Drive, Users have to set password manually or recovery password is required to unlock the drive.
In Drive E:, User has set manual password:
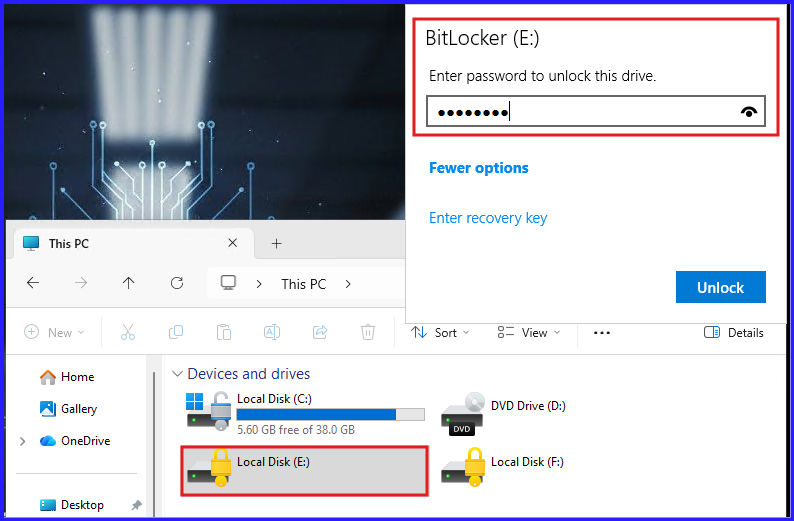
In Drive F:, user has not set the manual password so to unlock this drive, required Recovery Password. If need to set manual password, first unlock the drive with recovery password and set password.
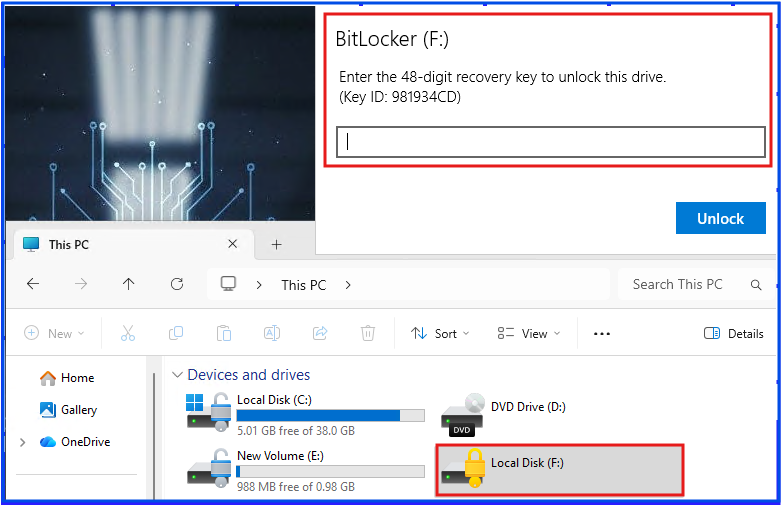
For Recovery password, user can get from System administrator and i have covered how AD managed BitLocker key and retrieve. I covered in bitlocker series part2.
Conclusion
Transitioning to manual BitLocker protectors represents a critical milestone in maturing your organization’s security posture. By removing the “Auto-Unlock” convenience, we ensure that data is only accessible to authorized users who possess both the physical device and the knowledge of its unique credentials. While this adds a step to the user workflow, it provides an essential layer of defense-in-depth, ensuring that even if a machine is lost or stolen, the underlying data remains a cryptographically sealed vault. As an administrator, your final safeguard remains the automated backup of recovery keys to Active Directory, ensuring that manual security never results in permanent data loss.